

This block was created initially as a sample to demonstrate how to make a no-sew fabric block for the FemEdTech Quilt of Care and Justice in Open Education.
The post is the first of two stories of two no-sew fabric blocks. The second is at http://femedtech.net/published/trying-to-print-a-no-sew-quilt-block-from-ccl-image/ .
The Call for Contributions (and other goodies to come) is at http://quilt.femedtech.net.
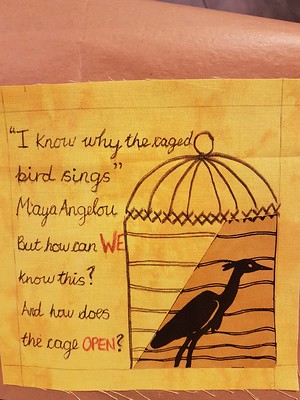
Finished bird block
The idea for the block
My starting point was the title of one of Maya Angelou’s autobiographical books I Know Why The Caged Bird Sings. I read it many years ago, and I still recall the impression it made on me, though I had forgotten that its title was inspired by a poem by Paul Laurence Dunbar. Angelou wrote of a life very different from mine: her book was a window into her life. I looked through my fabrics and found a piece of fabric that I bought from a vendor of African Art fabrics and chose a bird that almost looked as though it was behind bars. I am assuming the fabric is African but I don’t know which country it’s from, let alone who made it. (You could use a plain fabric, cut into the shape you were thinking of.)
As I was designing the block, the questions I wrote were troubling me:
But how can we know this?
And how does the cage open?
The author owned the experiences that I, as a reader, could learn more about but not fully know. And the second question is even more troubling, as it is about how freedom is achieved and the role of the enslaved and the already “free”.
So I have made a block with the beautiful words of two other writers, an image from an unknown artist and posed questions that I can’t answer.
Now, I’ll share the details of how I produced the quilt block with fabrics, bondaweb, pens, scissors, iron and NO SEWING.
Materials
Scrap of fabric with bird image
Bondaweb, same size as previous scrap (try local fabric shop or beg from sewing friend or ebay)
Plainish background fabric (to contrast with lettering/drawing) cut to 7 inch square. Calico is a great low price cotton fabric to use as a base – available at local fabric shop.
Frixion pen (temporary marker that can be ironed off), useful for trying design, marking guidelines and lettering on fabric square. These are available from good stationers, and can be passed on afterwards to young friends who want to do invisible writing (the cap has an eraser for heat erasure).
Fabric pen(s) – permanent marker pen designed for fabric and fixed by ironing (try local art shop or online). Sharpie pens will bleed into fabric so better avoided.
Baking parchment for protecting iron and ironing board when ironing to fix the text and drawing.
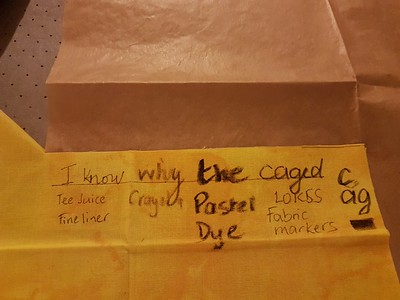
Samples of different fabric pens
Resources
A good resource can be a friend/colleague who has done this sort of thing before – ask around J
There are lots of resources available online via search engine and searching youtube for suitable videos.
Here’s a page from manufacturer web site https://www.vlieseline.com/Products/Creative-Range/Bondaweb
And a very useful video https://www.youtube.com/watch?v=bM8JgFWWUIo that’s probably worth watching before you start.
We have a Support and Resources living document – please consult and add resources.
Process
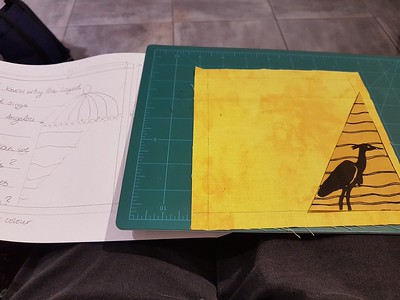
I chose the bird I wanted to feature, and based my design around it. It already had lines across it that might be bars so I extended these to suggest a cage, to be placed on the right hand side of the block. I sketched this on to a piece of paper containing a 6 inch square that is the boundary of the visible image. Originally, I planned for a 6.5 inch square block but made it 7 inch square to allow for any irregularities that might creep in.
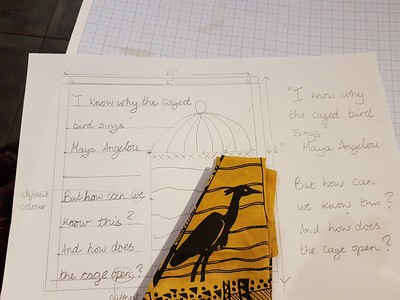
Design Sketch
I then thought about the words I wanted to write on the rest of the block and experimented with size and positioning on the sketch.
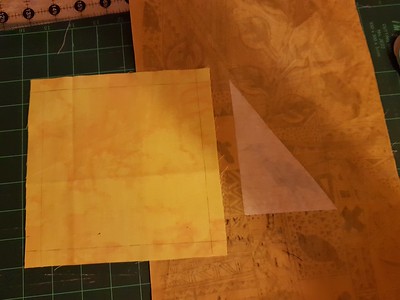
Bondaweb stage
Next, I cut out a piece of bondaweb slightly larger than the cut out fabric I wanted. The rough side of the bondaweb was ironed on to the back of the fabric and then the shape was cut out.
Comparison with design
The paper lining was pulled off leaving the bird shape ready to be ironed on to the block that I had cut out as a 7 inch square.
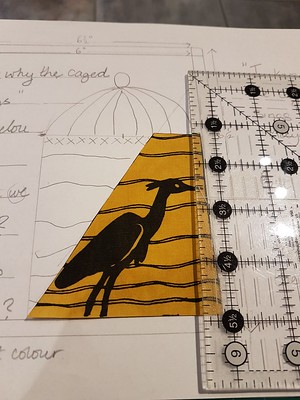
Bird appique tried against paper design
To complete the bird applique, I tried it against the paper design, and then trimmed it .
Then I ironed the bird on to the 7 inch fabric square, within the boundaries of the finished 6 inch square.
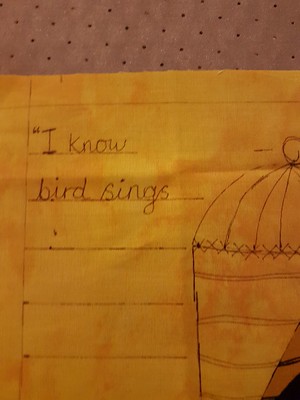 Using the Frixion temporary marker pen, I drew out the rest of the design on the block. This proved to be a good move as I noticed I had missed out a word. I was able to rectify this before using the permanent fabric pen to draw the remainder of the cage and the words.
I fixed the permanent ink with a generous ironing, using the baking parchment to protect iron and board.
Then the block was complete!
All photos in album https://www.flickr.com/photos/francesbell/albums/72157711664732357

1 Pingback